
Pruning
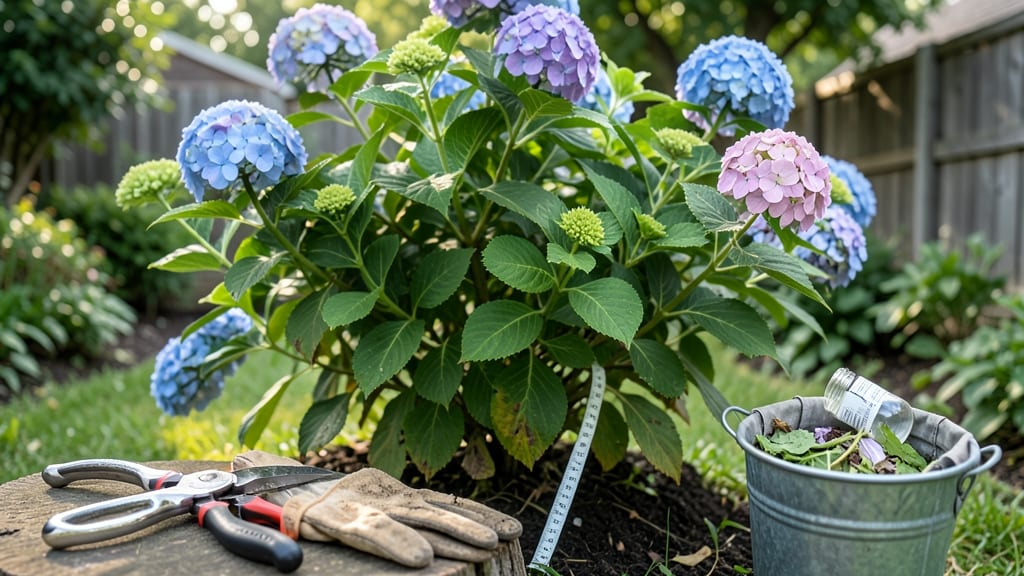
Cutting back overgrown shrubs isn't just about making them look tidy—it's about reviving their health and encouraging vibrant new growth. I've learned the hard way that aggressive pruning can shock plants into dormancy, while the right technique turns them into bushier, more productive powerhouses.
The key is knowing when and how to prune for your specific shrub type, because what works for a hydrangea won't work for a lilac.
First, gather your tools: sharp pruners for clean cuts, loppers for thicker branches, and gloves to protect your hands from thorns or rough bark. Timing matters too—most shrubs should be pruned in late winter or early spring before new growth starts, though some (like spring-blooming shrubs) need a different approach.
Start by removing any dead, diseased, or crossing branches first—they're the easiest to spot and make the biggest difference.
What you'll end up with is a shrub that looks neater and more intentional, not just smaller. The right cuts stimulate fresh foliage, improve airflow (which prevents fungal diseases), and even encourage bigger blooms.
For example, pruning a boxwood into a neat hedge creates clean lines, while shaping a butterfly bush opens up its center for better airflow and more flowers. The transformation happens faster than you'd expect—just a few weeks of proper care shows dramatic results.
This method works for foundation shrubs, privacy screens, and even small trees—just adjust the technique based on the plant's natural shape and growth habits. The same principles apply whether you're tackling a 6-foot tall hydrangea or a sprawling 9-foot arborvitae.
Let's get those shrubs back in shape without stressing the plants (or yourself).
📚 In This Guide
- What you need
- Instructions
- Tips and common mistakes
- Wrapping up and next steps
What you need
- ● Pruning shears: Bypass pruners (for clean cuts on small to medium stems, 10-12 inches blade length). Sharpness is key!
- ● Loppers: For thicker branches (1.5–2.5 inches in diameter), with long handles (24–36 inches) for leverage.
- ● Pruning saw: A curved-tooth saw for large, woody stems (3+ inches thick).
- ● Gloves: Heavy-duty, gardening or cut-resistant gloves to protect hands from thorns and debris.
- ● Safety glasses: To shield eyes from flying debris (especially when using a saw).
- ● Ladder or step stool: If shrubs are tall (6+ feet), use a stable, non-slip ladder or stool.
- ● Disinfectant: Rubbing alcohol or 70% isopropyl spray to clean tools between cuts (prevents disease spread).
- ● Rake or broom: For clearing fallen leaves/debris after trimming.
- ● Trash bags: To collect clippings (or compost them if preferred!).
- ● Hose or bucket: For rinsing tools post-trimming.
- ● Marking twine or spray paint: To outline areas for selective pruning (helpful for complex shrubs).
Step-by-step instructions for cutting back overgrown shrubs
Revitalize your shrubs with precision cuts—this method restores shape, encourages new growth, and prevents disease.
Assess the Shrub’s Structure and Growth Habits
Start by examining the shrub from all sides to identify its natural shape and growth pattern. Look for dense areas where branches overlap or grow inward—they’ll need the most aggressive trimming. Notice where new growth emerges; these areas are your guides for where to make cuts. If the shrub has flower buds, locate them now, as they’ll determine how far back you can trim.
For deciduous shrubs, wait until late winter or early spring before new growth begins. Evergreens can be pruned anytime except during extreme heat or cold. If the shrub has been neglected for years, don’t attempt to rejuvenate it all at once—focus on one-third of the oldest branches first to avoid shocking the plant.
Gather Tools and Prepare the Work Area
Use sharp, clean bypass pruners for small branches under ½ inch in diameter and loppers for thicker stems up to 2 inches. For anything larger, a pruning saw with a fine-tooth blade will cut cleanly without tearing. Disinfect your tools with rubbing alcohol or a 10% bleach solution to prevent spreading disease between cuts.
Clear the area of debris, weeds, and any nearby plants that might get in the way. Lay down a tarp or spread mulch to catch fallen branches and clippings. Wear gloves to protect your hands from thorns, sap, or sharp edges. If the shrub is large or high, use a stable ladder with non-slip feet—never stand on wobbly or uneven surfaces.
Remove Dead, Diseased, or Damaged Branches First
Scan the shrub for branches that are brown, brittle, or hollow—these are dead and should be removed entirely at their point of origin. Cut just outside the branch collar, the swollen area where the branch meets the trunk. Avoid leaving stubs, as they can trap moisture and invite rot. If you see mushrooms, powdery mildew, or oozing sap, these branches may be infected and should be bagged and disposed of, not composted.
Next, look for crossing branches or those rubbing against each other. These create wounds that weaken the shrub and invite pests. Remove the smaller or weaker of the two branches at its base. For suckers—shoots growing from the base or underground—cut them off at ground level to redirect the shrub’s energy upward.
Thin Out the Interior and Shape the Outer Form
Step back and visualize the shrub’s ideal shape—often a rounded or vase-like form for most ornamental shrubs. Start thinning from the inside out: Remove branches that grow inward or downward to improve air circulation and sunlight penetration. Aim to create an open center that allows light to reach the inner branches. For each cut, step back occasionally to check your progress—you’re sculpting, not hacking.
For the outer shape, use your hands as a guide: Imagine cupping the shrub to form its natural silhouette. Cut back branches that extend beyond this shape, making your cuts at a 45-degree angle just above a bud or leaf node facing outward. Avoid cutting directly above a bud, as this can leave a wound that heals poorly. If a branch is too long, you can make two or three cuts along its length to gradually shorten it.
Clean Up and Monitor for Recovery
After trimming, rake up all clippings and dispose of them properly—never leave them piled around the base of the shrub, as they can harbor pests or disease. Water the shrub deeply to help it recover, especially if you’ve made extensive cuts. In the weeks following, keep an eye out for new growth at the trimmed areas—this is a sign the shrub is healing. If you notice yellowing leaves, wilting, or excessive sap, the cuts may have been too severe, and you’ll need to adjust your approach next time.
For the next 1-2 years, avoid heavy pruning—let the shrub focus on regrowing. You can perform light maintenance trims to shape it up, but resist the urge to drastically reshape it again. Over time, your shrub will reward you with denser foliage, more flowers, and a stronger structure.
Tips & tricks for perfect shrub trimming
These practical insights will help you transform your overgrown shrubs without stress or guesswork.
Seasonal Timing Matters: The instructions mention waiting for late winter or early spring for deciduous shrubs, and avoiding extreme heat or cold for evergreens—but here's the key detail: Morning is always better than afternoon. Prune when temperatures are cooler, and the shrub is fully hydrated. This reduces stress on the plant and minimizes sap bleeding, which can attract pests. I've seen shrubs recover dramatically faster when trimmed in the morning hours.
The One-Third Rule: When dealing with neglected shrubs, focus on removing only one-third of the oldest branches in the first year. This prevents shock and allows the plant to redirect energy to new growth. Mark the branches you plan to trim with a piece of twine or ribbon before you start cutting—this visual cue helps you stay disciplined. After the first year, you can gradually increase your cuts, but never remove more than one-third in a single session.
Tool Precision Pays Off: The instructions specify using bypass pruners for branches under ½ inch, but here's what nobody tells you: Always make your cuts just outside the branch collar at a 45-degree angle. This creates a larger wound surface that heals faster. For thicker branches, use loppers, but make sure they're sharp—dull tools crush the wood instead of making clean cuts. I keep a small file in my toolkit to sharpen blades between cuts when needed.
Recovery Monitoring: After trimming, watch for new growth at the trimmed areas within 4-6 weeks. This is your plant's way of saying "thank you" for the precise cuts. If you see yellowing leaves or excessive sap, it's a sign you may have been too aggressive. In this case, reduce your cuts next time and focus on maintaining rather than rejuvenating. The goal is gradual improvement, not immediate transformation.
Pro Tips for Cut Back Overgrown Shrubs
- These practical insights will help you transform your overgrown shrubs without stress or guesswork.
- Seasonal Timing Matters: The instructions mention waiting for late winter or early spring for deciduous shrubs, and a...
- The One-Third Rule: When dealing with neglected shrubs, focus on removing only one-third of the oldest branches in th...
Frequently asked questions
Got questions about tackling those wild shrubs? You’re not alone!
Here are some of the most common concerns—plus clear, actionable answers to keep your shrubs (and your sanity) in check.
When is the best time to trim overgrown shrubs?
The ideal timing depends on your shrub type! For spring-flowering shrubs (like lilacs or azaleas), prune right after blooming to avoid cutting off next year’s flowers. For summer/fall-flowering varieties (e.g., hydrangeas or abelia), trim in late winter or early spring before new growth starts. Evergreens can be shaped anytime, but avoid heavy cuts in extreme heat or cold.
How much can I cut back without harming the shrub?
Most shrubs handle a 25–30% reduction in size per year without stress. For severely overgrown shrubs, you can remove up to ⅓ of the plant in one season, but spread it over 2–3 years if possible. Avoid "topping" (cutting back to stubs)—this encourages weak, leggy growth. Look for natural branch layers to guide your cuts.
What should I do if my shrub looks sad after pruning?
Don’t panic! A few signs of recovery:
- New buds appearing within weeks—this means the shrub is responding.
- Healthy green leaves replacing yellow or brown ones.
- No blackened stems (a sign of disease) or excessive wilting.
Can I use hedge trimmers for all shrubs, or should I use hand pruners?
Hedge trimmers are great for large, dense shrubs with thick foliage (like privet or boxwoods), but they can damage smaller branches or tender stems. For delicate shrubs (e.g., roses, hydrangeas, or ornamental grasses), switch to hand pruners or loppers to avoid tearing. Always sterilize tools between cuts (wipe with rubbing alcohol) to prevent spreading disease.
What’s the difference between pruning and shearing?
Pruning is selective cutting to remove dead, diseased, or overcrowded branches, while shearing is uniform trimming to create a neat, formal shape. Over-shearing can stress shrubs by removing too many leaves (where photosynthesis happens!). Reserve shearing for formal hedges or topiaries—most flowering shrubs thrive better with pruning.
Pro Tip: Label your cuts!
If you’re unsure which branches to trim, snap a photo of your shrub before pruning. Use a plant ID app (like PictureThis or PlantNet) to confirm care instructions. For tricky shrubs, consult a local nursery—they often have experts on hand!
Wrapping up and next steps
Cutting back overgrown shrubs doesn’t have to be daunting—with the right tools, timing, and technique, you’ll transform your yard into a thriving, well-manicured space. Remember, patience and precision are key: focus on shaping gradually, prioritizing health over perfection, and always rewarding your shrubs with proper aftercare. 🌿
Now that you’re armed with knowledge, grab those shears and get started! For extra confidence, watch a few YouTube tutorials or consult a local nursery for personalized advice. Your shrubs—and your neighbors—will thank you!