
Shrubs
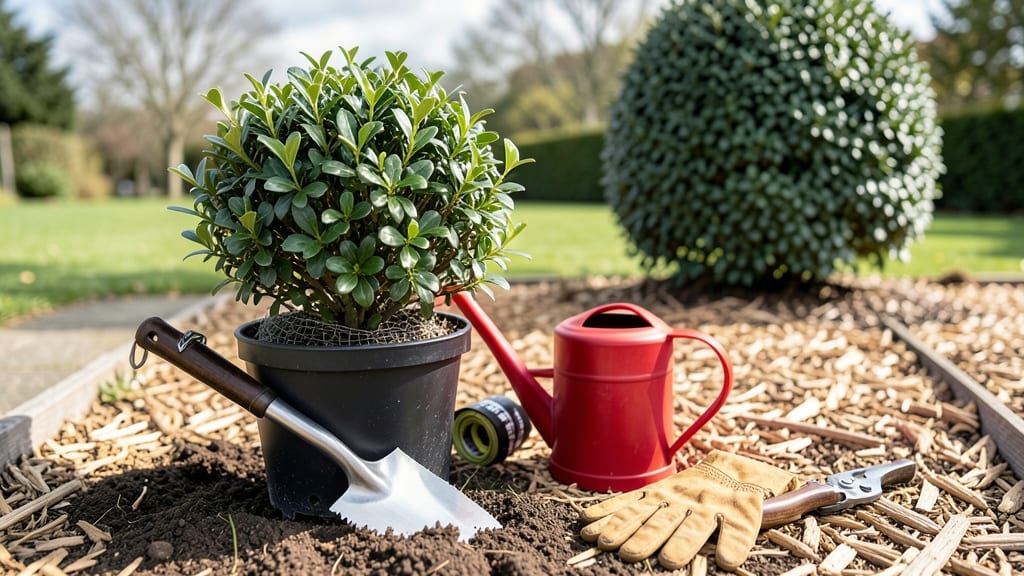
Planting boxwood shrubs transforms a bare corner into year-round structure with minimal effort. ✨ I’ve planted hundreds over the years, and the secret to success lies in three simple steps that even beginners can nail—no green thumb required. Start with well-draining soil and full sun to partial shade.
Boxwoods hate soggy roots, so amend heavy clay with compost and avoid low spots where water pools. Dig holes twice as wide as the root ball but only as deep—they need room to breathe but won’t thank you for being buried too deep.
After planting, water deeply to settle the soil, then mulch to keep moisture consistent. Within weeks, you’ll see new growth, and by next spring, your shrubs will form that polished, evergreen backbone your garden deserves. The key is patience—boxwoods mature slowly but reward you with decades of reliable structure.
Spacing matters more than you’d think. Give mature shrubs 3–6 feet apart depending on variety, and prune lightly after planting to encourage bushier growth. Overcrowding leads to leggy, weak plants that struggle to fill out, while proper spacing means less pruning later.
Common mistakes? Planting too deep (root flare should sit above soil), skipping mulch (which invites weeds and moisture loss), or using poor soil. Boxwoods tolerate neglect once established, but give them these basics, and they’ll thrive with almost no maintenance.
📚 In This Guide
- What you need
- Instructions
- Tips and common mistakes
- Wrapping up and next steps
What you need
- ● Boxwood shrubs: 1–5 plants (depending on desired size and spacing—3–4 feet apart for standard varieties, 5–6 feet for larger types). Choose healthy, well-rooted specimens with vibrant green foliage.
- ● Shovel or spade: A digging spade (12–16 inches wide) for planting holes or a matlock shovel for precision.
- ● Garden gloves: A pair of durable, breathable gloves (e.g., leather or nitrile-coated) to protect your hands.
- ● Compost or well-aged manure: 2–3 gallons per plant to enrich the soil.
- ● Slow-release fertilizer: 10–15–10 or 12–12–12 blend (follow package rates for application).
- ● Mulch: 2–3 inches of organic mulch (e.g., shredded bark, pine straw, or wood chips) to retain moisture and suppress weeds.
- ● Watering can or hose with a gentle spray nozzle: For deep but gentle watering after planting.
- ● Measuring tape or ruler: To ensure proper spacing and hole depth (2–3 times wider than the root ball, same depth as the container).
- ● Soil test kit: To check pH (boxwoods prefer 6.0–7.0) and adjust if needed.
- ● Epsom salt: 1 tablespoon per plant for magnesium (if soil is deficient).
- ● Plant stakes or cages: For support if planting in windy areas or training young shrubs.
- ● Pruning shears: For light trimming after planting to encourage fuller growth.
- ● Drip irrigation system: For consistent moisture during the first few weeks.
Step-by-Step instructions for planting boxwood shrubs
Here's how I plant boxwoods for lush, structured hedges that stay healthy for years.
🪴 Step 1: Prepare the Planting Site
Boxwoods thrive in well-draining soil with partial shade, so choose a spot that gets 4-6 hours of morning sun or dappled light. Clear weeds and loosen the soil to a depth of 12 inches with a garden fork, breaking up any compacted areas. Boxwoods hate soggy roots, so if your soil drains poorly, mix in 2-3 inches of compost to improve aeration.
Dig holes that are twice as wide as the root ball but only as deep as the container. The top of the root ball should sit just 1 inch above ground level—burying too deep suffocates the plant. I like to set the shrub in the hole and check that the top of the root ball aligns with the surrounding soil line before backfilling.
🌱 Step 2: Plant and Water Thoroughly
Gently remove the boxwood from its container and tease the roots outward if they're tightly bound. Place the shrub in the hole, ensuring the root ball sits level and centered. Backfill with the native soil, pressing lightly around the edges to eliminate air pockets. Avoid compacting the soil too firmly—boxwoods need room for roots to spread.
Water deeply right after planting to settle the soil and encourage root contact. Use 1-2 gallons of water per shrub, enough to moisten the soil to a depth of 6-8 inches. Mulch the base with 2-3 inches of organic mulch, keeping it 3 inches away from the trunk to prevent rot. This helps retain moisture and keeps roots cool in summer.
☀️ Step 3: Maintain for Long-Term Health
Boxwoods establish slowly, so water once a week for the first month to help roots settle. After that, they’re drought-tolerant but prefer consistent moisture—water when the top 2 inches of soil feel dry. Prune lightly in early spring to shape the shrub, cutting just above a leaf bud to encourage bushy growth. Avoid heavy pruning in fall, as new growth won’t harden off before winter.
Fertilize in early spring with a balanced, slow-release fertilizer to support new growth. I use a 10-10-10 formula at half strength to avoid overfeeding. Boxwoods are low-maintenance once established, but watch for signs of stress like yellowing leaves—this often means overwatering or poor drainage. Adjust care based on your climate; container-grown boxwoods may need more frequent watering in hot, dry spells.
Tips & tricks for planting boxwood shrubs
Here's what nobody tells you about planting boxwoods that'll make all the difference in their long-term health.
Soil Depth Secret: When loosening that 12-inch depth of soil in Step 1, focus on breaking up any hardpan layers you encounter. I use a garden fork to gently pry apart compacted soil—this helps roots penetrate deeper. If your soil is particularly dense, consider adding a layer of coarse sand mixed with the compost to improve drainage even more.
Root Ball Alignment: That 1-inch above-ground position for the root ball in Step 1 is crucial—it prevents stem rot while allowing roots to access oxygen. I like to use a small wooden stake as a reference point when checking alignment before backfilling. If the root ball sits too low, the plant will struggle to breathe.
Watering Wisdom: The 1-2 gallons per shrub in Step 2 should be applied slowly to avoid runoff. I use a watering can with a rose attachment to direct water at the base rather than pouring from above. This ensures the 6-8 inch soil depth gets properly saturated without creating surface puddles that can drown the roots.
Mulch Placement: That 2-3 inch mulch layer in Step 2 should be spread evenly but kept 3 inches away from the trunk to prevent moisture buildup. I use a rake to create a slight depression around the base before adding mulch—this helps channel water directly to the roots while keeping the trunk dry.
Pro Tips for Plant Boxwood Shrubs
- Here's what nobody tells you about planting boxwoods that'll make all the difference in their long-term health.
- Soil Depth Secret: When loosening that 12-inch depth of soil in Step 1, focus on breaking up any hardpan layers you e...
- Root Ball Alignment: That 1-inch above-ground position for the root ball in Step 1 is crucial—it prevents stem rot wh...
Frequently asked questions
Got questions about planting boxwood shrubs? You’re not alone! Here are some of the most common concerns—plus quick, practical answers to help you grow lush, healthy hedges with confidence.
When is the best time to plant boxwood shrubs?
The ideal time is early spring or early fall when temperatures are mild (50–70°F). This gives roots time to establish before extreme heat or cold sets in. Avoid planting in summer—boxwoods hate stress from drought or intense sun.
Can I plant boxwood shrubs in winter?
While bare-root boxwoods can handle winter planting (especially in colder climates), container-grown shrubs struggle with frozen soil. If you must plant in winter, choose a mild day above freezing, water thoroughly, and mulch heavily to protect roots.
How close should boxwood shrubs be planted?
Spacing depends on your goal:
- Hedges: 2–3 feet apart for dense growth.
- Specimen shrubs: 4–5 feet apart to allow airflow.
- Topiary shapes: 3–4 feet apart for pruning flexibility.
Why are my boxwood leaves turning brown after planting?
Brown leaves often signal transplant shock, dehydration, or pests. First, check soil moisture—boxwoods need 1 inch of water weekly. If issues persist, inspect for boxwood blight (fungus) or boxwood leafminer (tiny yellow larvae). Prune affected areas and treat with fungicide if needed.
Are there drought-tolerant boxwood alternatives?
Yes! If your climate is dry, try:
- ‘Green Velvet’ boxwood (thicker leaves, less water).
- Dwarf English boxwood (Buxus sempervirens ‘Suffruticosa’).
- Inkberry holly (Ilex glabra)—native and low-maintenance.
- Abelia shrubs for a similar structure with better drought resistance.
Wrapping up and next steps
Planting boxwood shrubs is a rewarding way to add year-round structure and elegance to your landscape—whether you’re lining a path, framing a doorway, or creating a lush hedge. With the right soil prep, spacing, and care, these versatile evergreens will thrive and grow into a stunning focal point.
Now that you’re equipped with the know-how, roll up your sleeves and get ready to transform your outdoor space! 🌿
Ready to take the next step? Check out our guide on pruning and maintaining boxwoods to keep them looking their best for years to come!